Showing posts with label Breakfast. Show all posts

Wednesday, 1 April 2015

Delicious Breakfast


My teenage daughter woke up at 5:30 this morning to throw up. Nice alarm clock for a Saturday morning - NOT. By 10 A.M., she had thrown up so many times, she lost count. Poor thing. The first thing I had her do was to take some Wild Mediterranean Oregano essential oil. I make an oil blend that is gentle enough to swallow by mouth, but so potent, that we use it as a natural antibiotic at our house. In fact, our daughter has never had to take prescription antibiotics - ever. It has kept me antibiotic-free for 20 to 25 years at least (I've lost track). It has saved us probably thousands of dollars in doctors visits alone. CAUTION: Don't take oregano oil strait or you may wish you were dead - it burns the mouth and throat so bad.

Tip: Whenever anyone in our home has gotten sick, I remind the rest of us to take a little oregano oil blend as a preventative measure. It works.

My daughter soon tells me that she can't even keep any water down. I know she is absorbing some of the wild oregano anyway, and I also know it is annihilating this bug she has, it will just take a short time to see the effects.

I have her rub a combination of virgin coconut oil and a mixture of sickness fighting essential oils on the soles of her feet. I instruct her to do this at least every hour. The oils make their way into the body to help fight off the sickness. Cool, right?

I proceed to make her a strong ginger tea. Ginger is one of the best things you can take for an upset stomach and nausea. Ginger is even effective for motion sickness and morning sickness. I sweeten it with about 4 drops of sugar-free stevia glycerite. See our recipe for stevia glycerite on this blog.

I let the ginger tea steep 10 minutes and then take it to my daughter. I tell her about ginger being a perfect remedy for her stomach. She asked me, will it help? I told her, "It certainly will." She's feeling pretty miserable, I want to give her some hope. Honestly, she has been sick so infrequently, that it is a shock to her. She hasn't had all the sickness that most kids have. I have to let her know that she will live. Don't laugh.

Next, I make a pot of hot rice porridge. Rice is very easy on the stomach. I have a special recipe I use, which I will share here. I use basmati rice (brown or white) and I add a little psyllium husk to it. Psyllium is a fiber that is also soothing and detoxifying to the digestive tract. It also gives a nice creamy texture to the hot cereal. We love it for it's blood sugar regulating effects. Psyllium slows the absorption of sugars and carbohydrates, which helps to even out your blood sugar levels. That's a good thing for maintaining health.

Another important tip is to salt all of your hot cereals as you are cooking them. It takes hot cereal from flat and boring to actually tasting good. It brings out the flavors nicely. Even salting to the point of the cereal being on the savory side is delicious, and is our family's favorite way to prepare mush. We have used BioSalt for this purpose for years. It is a balanced salt, that negates water retention in the body. See our BioSalt recipe on this blog.

For my daughter's situation, I sweeten the hot porridge with wild flower honey (preferably raw), as it is healing too. I sprinkled her cereal with ground ginger and cinnamon and topped it off with a little pad of butter. I then added a little organic whole milk.

Let's cross our fingers. Will the cereal stay down?

I made cereal fort the rest of the family too. This cereal is a delicious comfort food, plus it's cold outside and this is nice and warming. The basmati rice makes this cereal special. Try it!

We nicknamed this particular recipe "Fiji Rice Mush." Mom created it while living in Fiji. It gives a nice exotic twist to mush's name, don't you think?


Fiji Rice Mush Recipe:

2 c. uncooked Basmati rice (brown or white)
2 t. finely ground psyllium husk powder


Method:

Grind the rice kernels and psyllium in a high powered blender until it becomes a fine powder.

You may find it easier to grind in 3 batches.

Store what you won't be cooking in the freezer.


To Cook the Fiji Rice Mush:

In a large saucepan, mix 1/3 c. ground rice mixture and 2 cups water. Add 1/2 t. BioSalt or sea salt.
Stir and cook until thick on medium-high heat.
Reduce heat and cook on the lowest heat for at least 10 minutes. Add more water as needed.
Remove from heat, cover, and let sit 20 to 30 minutes.
To keep hot, cover with a folded terry cloth towel.
Check for salt, and adjust is desired.
Serve with coconut milk, organic milk, or nut milk.


Note:

The psyllium husk slows the absorption of the starch in the rice. Psyllium also extends the amount of porridge made because it absorbs a lot of water. It helps your blood sugar levels not to spike and then crash, helping with weight loss. Psyllium is also good for the digestive system and helps you feel full longer.

Monday, 30 March 2015

Stuffed Focacia


A sandwich? A pizza? What is that, you ask?

Answer: It's a stuffed focaccia and yes, it tastes as good as it looks!! No, it tastes better. It does taste a bit like pizza ... only better! A little like a sandwich ... only better. It tastes gooood!

 I'd like to blow my own trumpet but the recipe isn't mine. I got it off a gorgeous site called The Italian Dish.   Elaine, the author/creator of The Italian Dish stuffed her facaccia with sausage and onion and boy, did it look sexy. I had to make it. Had to.


This, Elaine says, is perfect for breakfast, lunch and dinner. Hey that's like all Malaysian food. We eat nasi lemak, thosai, noodles and roti canai (etc) for breakfast, lunch and dinner too.

I decided to test the theory out. I served this focaccia to R for breakfast and dinenr (ok, I was lazy and not at all testing any theory out). He loved it and didn't mind the repeats! So, yeah, thanks Elaine.


Breakfast for me is a nice big cup of iced tea, Malaysian style (thick tea with lotsa sweet milk). All my friends and everyone I work with (even people I don't really talk to) knows that I HAVE TO have a huge mug of tea before I can function. Those who are really close to me, like my good friend Sree (also my traveling partner)  know that they should stay clear if I haven't had my tea.

And yet, I love breakfast. Well, I love breakfast food. Eggs are a favourite; as are puff pastries (I love croissants) and bread. So, I kept a slice of this gorgeous creature for my Sunday dinner.

What this is, really, is genius. You make your focaccia dough, you divide it into two. Instead of spreading it out on a rectangular baking pan/sheet, you use a round, spring form pan. You spread one portion of the dough on the base of the pan, add whatever filling you wish in  the center and lay the other piece of dough on top, indenting it and drizzling olive oil and toppings (herbs or chilli, salt and pepper) as usual.


Elaine's recipe for focaccia differed a little from mine. Her's is courtesy of award-winning cook Carol Field and uses a sponge (a starter) to give the dough a better rise and a softer, spongier texture. The recipe was genius and I think this will be my go to recipe for focaccia for a while.
.
For my stuffing, I chose roasted red peppers, sauteed mushroom and cheese. It was good but I really should have packed more stuffing in! Next time I will. And next time, I'll make a chunkier, more robust filling because this bread deserves it.

Try it! You have to try it.


Stuffed Focaccia Bread With Sausage and Onions
adapted from The Italian Dish

The sponge
1/2 cup tepid water
3/4 teaspoon instant yeast
3/4 cup all purpose unbleached flour

The dough
1 heaped teaspoon instant yeast
1 cup water
3 tbsp olive oil
3.25 cups unbleached all purpose flour (+/-)
 2 tsp sea salt

The Stuffing
Anything you wish!

Topping
2 tbsp extra-virgin olive oil
Coarse sea salt
black pepper and a sprinkling of chili flakes/dried herbs

First, we make the sponge.
Sprinkle the yeast over the warm water in the bowl of your stand mixer; stir in the flour and cover it with cling film and  let rise until double the original size (it will be a little bubbly) for about 45 minutes.

Moving on to the dough. Add the yeast, water and the olive oil to the sponge in the bowl. Using the dough hook, start mixing on a low speed and gradually add 3/4 of the flour and all the salt. The dough should come together; if it's sticking to the sides of the flour add more of the flour until the dough doesn't stick to the sides anymore (almost completely stick free). Make sure you don't have a dry ball of dough though. You should use the amount of flour stipulated or just a couple of tablespoons more. Thats all.  The dough should be nice and smooth and elastic.

Transfer the dough into a nicely oiled bowl, cover and leave it for about 75 mins. IT will rise to double its size.

Meanwhile, you can prepare your stuffing. I'm leaving this one up to you.

Assembling the bread
Lightly oil the base of a 23cm spring form pan.
Punch down the dough that's risen and divide it into two. Flatten one gently and transfer into the spring form pan, to cover the base nicely.
Add your filling and please, be generous.
Stretch the second portion of dough and place it atop the stuffing.
Dimple the dough with your fingers and drizzle some olive oil on the top. Sprinkle some salt, pepper, chilli flakes and herbs and let it sit for about 30 mins.
Preheat your over to 200C
Bake for 30-35 mins; your crust should be a rich gold.
Remove, drizzle a bit more olive oil and cover with a damp cloth until you're ready to serve.

Breakfast Pizza


I saw an article on MSN Money the other day about how Breakfast Pizzas are the new trend. I can’t speak for you all, but Vegan Breakfast Pizzas are now MY new trend! A girl can’t live on oatmeal and apples for breakfast alone, can she?

No, she cannot. Nor would she want to, not with vegan deliciousness like this within reach!

Vegan Breakfast Pizza

So what exactly goes on a Vegan Breakfast Pizza, you might be asking? Well… I guess anything you want, but for this particular breakfast pizza I went with crispy maple tempeh bacon and my healthy-yet-delicious tofu scramble full of peppers and onions. And a few slices of tomatoes. Oh, and some Daiya mozzarella, obvs.

I went with a thinnish crust and still found this to be a very satisfying breakfast. Of course, I’m that crazy person who likes to eat regular pizza (cold!) and leftover Chinese food for breakfast, so I fully realize this might not be everyone’s jam.

It is, however, the new trend, so you may as well get on board now. How’s that for some peer pressure first thing on a Monday?

Vegan Breakfast Pizza


Vegan Breakfast Pizza


  • Ingredients
  • 8 pieces of smokey maple tempeh bacon (I used Tofurky)
  • 3-4 Tablespoons maple syrup (optional)
  • Applewood smoked sea salt
  • 12" pizza crust of your choice (I recommend this one!)
  • 2/3 cup red pizza sauce
  • 2/3 cup plus 1+ cup Daiya mozzarella
  • 1 1/3 cup tofu scramble (minus sausage, kale and chives)
  • 1 tomato, sliced
  • Oregano
  • Crushed red pepper flakes
  • S&P to taste

  • Instructions
  • Fry the bacon in a pan according to package instructions. I also recommend drizzling the pieces with maple syrup as they cook. When they're done, sprinkle with the smoked sea salt, remove from pan and slice.
  • Spread pizza sauce evenly over crust, then sprinkle with first 2/3 cup Daiya. Top next with tofu scramble and then the bacon and tomato slices.
  • Top with the remaining Daiya (to taste), then sprinkle with oregano and crushed red pepper flakes, along with some S&P to taste.
  • Bake on a pizza stone at 425 for 14-16 minutes until the cheese is all nice and melty.
  • Enjoy!

Saturday, 28 March 2015

Shortbread


You know the saying "Stop looking for love; let love find you"? No? Well, in my teenage years when I was desperate for a date (its a long story, this isn't the place for it), I got that advice quite a bit. I thought it was just hogwash at the time but now I am not so sure.

I stopped looking and I found love.

No, this isn't a soppy account of how I met my husband. It's a soppy account of how I finally found the perfect shortbread.

You see, about two weeks ago, I went on a frenzied quest to find the perfect recipe for the perfect shortbread. I searched for and tried a dozen (well, not quite but close) different recipes. I don't think I found the perfect recipe for the perfect shortbread but I twas pretty happy with the results of Project Shortbread.

Then, when I wasn't looking, I found this recipe for Polvorones (Spanish shortbread). Or rather, it found me. I was doing my regular food blog rounds when I came across a recipe for Pistachio Polvorones on sophisticatedgourmet.com. It was love at first sight. The perfect little round sugar-coated cookies were so beautiful, so perfect. Actually, they reminded me of an Indian dessert I love — ghee balls —and I think that's what attracted me first.


I had to make these. I had no choice. It was fate.

Made of sugar, flour, butter and nuts, Polvorones are traditionally made around Christmas time. They're sometimes called "Wedding Cookies" (maybe its the dusting of powdered sugar that gives it a "wedding feel" — you know, white wedding and all that?) and can be found, individually wrapped kinda like a sweet — quite commonly in Spain, Mexico, the Philippines and America (well not exclusively in these places but especially so).

Now, let me tell you why I love these cookies. They are deliciously nutty ground almond and chopped pistachios — imagine that; they're fantastically soft and delightfully crumbly. The icing sugar on top adds to the allure of the cookie that, on its own, isn't terribly sweet.


It is my favourite shortbread... of the moment.

Pistachio Polvorones
(adapted from sophisticatedgourmet.com)

11/4 cup all purpose flour
3/4 cup whole wheat flour
pinch of salt
1/4 tsp ground cinnamon
226g butter, softened
3/4 cup icing sugar (and more for dusting)
11/2 tsp vanilla extract
1/2 tsp almond extract (optional)
3/4 cup chopped pistachios
1/4 cup ground almond

Whisk together the flours, salt and cinnamon. Set aside.
Using a mixer, cream the butter until fluffy. Add the sugar in gradually and continue mixing until the mixture becomes light and fluffy (about 3 mins). Add the vanilla and almond extracts.
With a spatula, fold in the flour. Add the ground almonds and pistachios and mix till a dough forms. Don't over mix the dough. Cover and refrigerate for at least 30 mins or till the dough (which is very soft at this point) firms up a little.

Once firm, remove the dough from the refrigerator and form little balls (between the size of a 10sen and 20sen coin) and place them an inch apart on a line baking sheet.

Place the tray of dough balls in the freezer for 15 mins.

Preheat the oven to 180C. Bake the cookies for about 15-18 mins or until the sides begin to get golden. Remove and let cool on the tray for 10-15 mins.

Coat with powdered sugar. Eat. Wow.

Lemon Coconut Bars

Lemon bars with a coconut crust and garnish. How's that sound to you? 

Well, I went a little crazy in the supermarket last week and bought two bags of lemons. I love lemons but it was only when I got home when I realised that perhaps 20 was a little bit too much. I could make lemonade, I guess. I could make a lemon pound cake, I suppose. Who am I kidding, with 20 lemons, I could make lemonade, a pound cake and still have too many lemons left over.

Overzealous. Gotta have more restraint next time. 

So, I made some lemonade (deliciously refreshing) but I axed the pound cake. I decided to make lemon bars instead. A tangy lemon bar with a shortbread crust. A sweet, citrus bar with a coconut, shortbread bar. Boy! I was getting quite excited. 


Nevermind that the lemon bar would just use up one, maybe two lemons. I was already imagining how the bars would taste. Picture this: a sweet, sightly crumbly shortbread laced with coconut flakes, toasted of course + a tart, soft, lemon filling that was not quite custard and not quite cake. The sweet, salty and coco-nutty crust with the tangy, fresh citrus filling. Topped with a sprinkling of coconut flakes, untoasted.

I decided to make a simple sandwich for dinner just so I could get right to the bars as quickly as possible. A light sandwich so I had space in my tummy for the bars.

Best idea I had!


Lemon Coconut bars
For the crust
11/4 cup all purpose flour
1/3 cup icing sugar
pinch of salt
113gms cold butter, cut into cubes
1/2 cup desiccated coconut, toasted

For the filling
3/4 cup Castor sugar
1/4 cup lemon juice
2 tbsp grated lemon zest
2 eggs
11/2 tsp all purpose flour
1/2 tsp baking powder
pinch of salt

Heat the oven to 180C.

Line a 20 X 20cm baking tray with aluminum foil with a overhang on two sides.

First the crust: Whisk together the flour, sugar and salt. Add the cold butter and coconut and mix it into the flour with your finger tips until the mixture resembles fine breadcrumbs and it starts to clump together a bit.


Press the crumbs onto the baking tray evenly. Bake for about 20 mins or until the edges of the crust starts to brown.

Meanwhile, prepare the filling. Whisk all the ingredients together till smooth.

Pour the filling into the warm crust once it's ready and bake for  about 20-25 minutes until the lemon filling begins to brown. It should be just set and feel springy.

Cool and then garnish with desiccated coconut or icing sugar or both.

Friday, 27 March 2015

Pumpkin Crepes

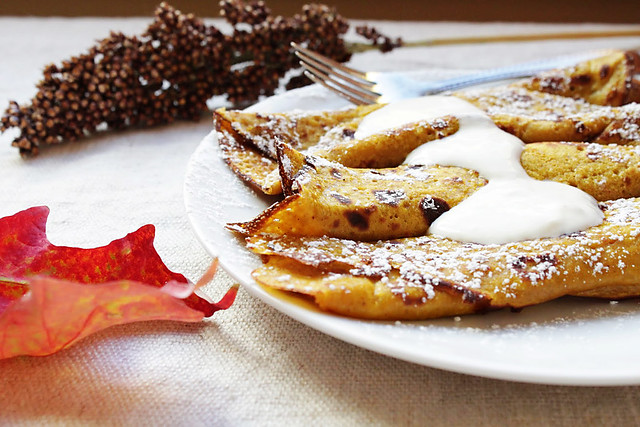
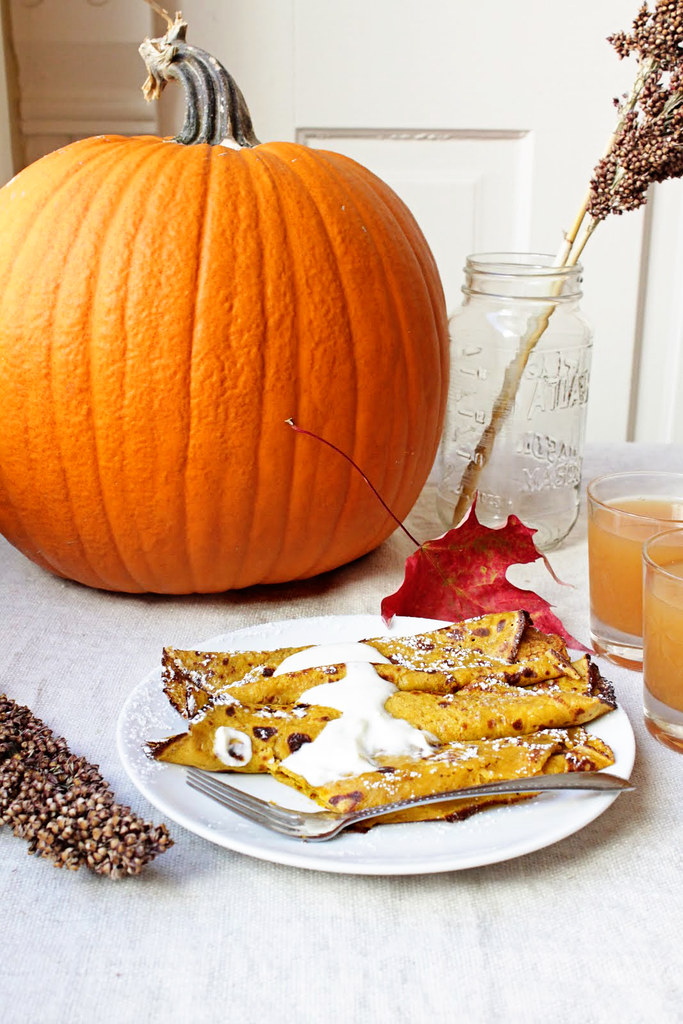
There are so many delicious ways to use pumpkin: pumpkin bread, pumpkin muffins, pumpkin pie. We decided to try something new. Pumpkin crepes! Topped with a dollop of creme fraiche and a sprinkling of powdered sugar, these are impossible to resist.

We added pumpkin puree and traditional pumpkin pie spices to our tried-and-true basic sweet crepe recipe. The result was a very delicate and almost custardy crepe that tasted just like (surprise!) pumpkin pie. We think that the recipe might need some more flour to make it a bit more hardy. As it stands, it takes some very gentle maneuvering -- and the assistance of a spatula -- to flip the crepes in the pan. But a little extra finessing was well worth it in the end!


Pumpkin Crepes
  • 1 cup pumpkin puree
  • 1 cup all purpose flour
  • 1 cup milk
  • 1/2 cup lukewarm water
  • 4 eggs
  • 4 tbs unsalted butter (plus more butter for coating the pan)
  • 1 tsp vanilla
  • 1/2 tsp ginger powder
  • 1/2 tsp ground nutmeg
  • 1 tsp cinnamon
  • 1/3 cup sugar
  • 1/4 tsp salt
Blend everything in a food processor or blender until smooth. Pour batter into a pitcher and cover with plastic wrap and let stand for 30 minutes. Place a nonstick pan over medium heat. Coat the pan with a little butter. Pour about 1/4 cup batter into the pan, lifting the pan off the heat and tilting and rotating it so that the batter forms a thin, even layer. Cook until top is set and underside is golden. Turn the crepe over with the help of a thin spatula and cook until the second side is lightly browned. (Careful! These crepes are fragile.) Remove crepe to a piece of wax paper. Continue cooking the rest of the crepes, buttering the pan and stirring the batter before starting each one. Stack finished crepes between sheets of waxed paper. Makes 10-12 crepes.

Spanish-Style Omelette

Do a Google search for "Spanish Omelette" and "recipes" and you will find yourself looking at many, many ways of making the potato omelette (I ended up with 1.4 million hits!) It's pretty confusing. Some sites claim the authentic Spanish Omelette comprises just potatoes, onions and eggs seasoned with salt and cooked in olive oil. Not even pepper should be added. Others add pepper and along with it red peppers or tomatoes or cheese or mushrooms or a combination of these ingredients and then some. 
Whaaat?
It's the same with the Spanish Omelettes I've eaten in restaurants: no two have been the same. 
Whaaat?
Well, until a senora or senorita comes to me with an authentic recipe, I'm calling mine a Spanish-Styled Omelette, an omelette inspired by the tortilla de patatas.  
(If you're perplexed like me, check out How To Make a Perfect Spanish Omelette in the Guardian. While it doesn't really answer the question of "What is an authentic Spanish Omelette", it does explain the different ways various chefs approach the dish. Renowned Spanish chef Ferran Adria apparently uses crisps (yes, potato chips) instead of sliced fresh potatoes! The article leaves off with a recipe for the "perfect" Spanish Omelette which you may want to try)

I stuck with the basics: potatoes, eggs, onions, chopped parsley; salt and pepper. I used olive oil, of course.

I did however add a garnish of grated Parmesan and red chilli flakes (definitely not authentic but I like chillies) right at the end.

The potatoes and the egg make the Spanish Omelette a perfect comfort-food dish. The layers of creamy, soft but not mushy potatoes and the lightly caramelised onions that are encased in an egg custard is just so simple but so fulfilling. It's a warm dish and I don't mean temperature. It warms you up. 


Spanish-Style-Omelette

3 large potatoes, scrubbed and sliced thin
2 large onions (white or red) sliced
3 tbsp olive oil
4 eggs
1/3 cup milk (optional)
salt
pepper
red chilli flakes
1/4 cup chopped parsley
a handful of grated Parmesan

Heat 2 tbsp oil in a pan. Add the onions and potatoes and toss them in the oil. Turn the heat low and cover the pan to let the onions and potatoes stew slowly. Stir occasionally so they cook evenly. Cook for about 20 minutes or until the potatoes are soft but not mushy; season lightly with salt.

Beat the eggs (and milk), season with salt and pepper. Add the potatoes and 3/4 the parsley and mix.

Heat 1 tbsp oil in a skillet and when hot, pour the egg mixture into the skillet. Keep the heat moderate to low. Cover for about 5 mins and check if the bottom is browned. When it is, sprinkle the chilli flakes and Parmesan and pop the omelette under the grill for about 5-7 minutes to firm up and lightly brown the top.

Garnish with parsley.

Saturday, 14 March 2015

Pumpkin Pancakes with Apple Cider Syrup


I've mentioned before that I love baking with pumpkin at this time of year.  I have a good pumpkin waffle recipe but lately we are more into pancakes than waffles...maybe it's because my waffle iron isn't the greatest, but anyhow, I wanted a good pumpkin pancake recipe and this one is it!  The batter comes out pretty thick making for thick pancakes, which I love, but if your preference is thin pancakes, I would add more buttermilk.  I've posted one recipe for Apple Cider Syrup but I think this one is my new favorite.  It goes GREAT with these pancakes.

Sometimes technology is so frustrating!  I don't know what's going on with Blogger tonight but I cannot get the recipe to post the way it should so the spacing is all over the place.

Pumpkin Pancakes


2 cups flour (Can substitute 1/2 - 1 cup wheat flour for the equivalent amount of white flour)

3 Tb brown sugar

2 tsp baking powder

1 tsp baking soda

1 tsp ground all spice


1 tsp ground cinnamon

1/2 tsp ginger

1/2 tsp salt

1 1/2 cup buttermilk (I do an overflowing 1/2 cup)

1 cup pumpkin puree

2 eggs

2 Tb canola oil

2 Tb vinegar

In one bowl mix together the buttermilk, pumpkin, eggs, oil and vinegar. Combine dry ingredients separately and them stir into pumpkin mixture just until combined. Heat your pan or griddle (lightly butter or oil if it is not seasoned), using about 1/4 cup for each pancake. Brown on both sides and serve hot with apple cider syrup.


Apple Cider Syrup
3/4 Cup sugar
1/4 cup brown sugar
2 TBs cornstarch
1/2 tsp ground cinnamon
1/4 tsp ground nutmeg
2 cups fresh apple cider (or juice would work)
1 Tbs fresh lemon juice
1/2 tsp vanilla
1/4 cup butter
Mix sugars, cornstarch, cinnamon and nutmeg well. Add apple cider and lemon juice. Bring to a boil and continue boiling for 1 minute, stirring constantly. Remove from heat and stir in butter. Store leftovers in the refrigerator, use within a week or two.

Aunt Katie's Oatmeal Pancakes


I love breakfast foods but most mornings it is cold cereal or oatmeal for us. The other morning, however, I decided to get fancy and made these oatmeal pancakes for the boys. They loved them and I loved that they loved them! I served them with Nauvoo syrup - yum! (See recipe for Nauvoo syrup posted with recipe for Oven French Toast Sticks.) This pancake recipe comes from http://sisterscafe.blogspot.com.

Aunt Katie's Oatmeal Pancakes

2 cups quick oats (I used regular old fashioned oats and ground them up a bit in my blender.)
1/2 cup flour
3 Tbsp sugar
1 tsp baking soda
1 tsp baking powder
1/2 tsp salt
2 1/2 cups buttermilk
2 large eggs (slightly beaten)
1/4 cup butter, melted
1 tsp vanilla
cinnamon (optional)

Combine dry ingredients. Add wet ingredients and let sit for 20-30 minutes, covered. Cook slowly on a griddle at 325 degrees or lower. Spray griddle before each batch.

Thursday, 12 March 2015

Banana Roll Recipe


It's strange. I don't quite like eating bananas but give me banana cake or bread and I'd gladly gobble it up. But, being a fussy eater, even with banana breads and cakes I prefer it when the taste of the fruit is not all empowering and is instead tempered  with spices like cinnamon or nutmeg. I've made banana bread before but I wasn't quite satisfied because though tasty, it tasted suspiciously like cake. I have been on the lookout  for an alternate recipe. So, when I spotted a recipe for a yeasted banana bread on My Diverse Kitchen, one that seemed more bread than cake -- i.e very little sugar and a moderate measure of banana, my curiosity was piqued. Actually, more like my greed. My hopes and expectation were high as the picture of the rolls depicted  on My Diverse Kitchen was tantalising.

So, I actually made it a point to get up real early on Saturday (to beat the traffic at the morning market -- believe it or not, it gets insane after 730am!) and got myself a bunch of ripe bananas: I chose the small, sweet pisang mas because I think they cook  well.  I had all the other ingredients in my pantry already: all purpose flour, cardamom, butter, salt, sugar and yeast so I was all set.

I followed the recipe to a T, with one exception: I used instant yeast instead of active dry yeast --  a small inconsequential adjustment. The recipe was easy enough to follow but let me caution you: it takes about 3 hours to make these rolls. You need to allow the dough to rise twice and the first rise is for 2 hours. Yes, 2 hours. Anyhow, it was worth the time. The rolls turned out well. They were soft and fluffy and just a little moist. And, it looked like a football/soccer ball! How apt that the World Cup final starts in less than 6 hours!

The only problem was that I could hardly taste the banana; they tasted too much like dinner rolls. Delicious dinner rolls, no doubt,  but where'd the taste of the cup full of mashed banana go? Perhaps the bananas I bought weren't sweet enough...


Told you I was fussy. No  matter, I finished the eight rolls the recipe yielded with the help of a couple of  friends and guess what I did? I  decided to give it another go, adding more banana this time around. After all,  I reasoned, I wasn't going to eat the remaining fruit in a hurry ...

Instead of 1 cup of mashed bananas, I used close to 2 cups. I added a bit more cardamom and a little nutmeg too. This time, it was just  perfect.

Here's the recipe.

31/4 cups all purpose flour
1/2 cup lukewarm water (plus a bit more, in case)

½ cup buttermilk

1 1/2 tsp instant yeast

3/4 tsp salt

1 tsp sugar

2 tbsp butter, at room temperature

1 cup banana, mashed

1/2 tsp  cardamom powder

1/2 tsp nutmeg powder

Melted butter for brushing on rolls once they're out of the oven

Whisk together the banana, water, buttermilk, yeast, salt, sugar, cardamom,  nutmeg and butter in the bowl of your stand mixer till all the ingredients are well incorporated. Fix the dough hook attachment  and,  adding the  flour in two batches, mix  the wet and dry ingredients till a dough forms, about 5 mins. The dough should be sticky and moist.

Remover the bowl from the mixer and cover with a damp cloth. Let it sit in a warm spot, allowing the dough to rise for about 2 hours. It should double it's size and deflate. If it hasn't deflated, de-gas it gently after the two hours are up.

Flouring your hands, gently form balls (the size is up to you; mine were half the size of a tennis ball) and arrange them (touching each other) in an 8-inch round cake tin.The balls need to be the same size: they look prettier and will cook more evenly.  Cover and let the dough balls rise again for about 30 -45 mins. Bake at 180C for 30 to 40 mins or till the tops are golden.

For soft rolls, brush the top with melted butter once you've taken them out of the oven. Set aside to cool. Best eaten warm.

Tuesday, 10 March 2015

Scrambled egg with tomato


There is no regional boundary where this dish comes from in China, it is popular among all Chinese not just in China but also worldwide unless anyone hates either or both the main ingredients. Such a simple dish but there is more than one way to cook it. I have tried it all and here is my review.

Method 1 : Cook the egg and tomatoes separately then mix them together. This is my preferred method too. Most people like to cook the egg first then the tomatoes, but I like to do the reverse. I find cooking the eggs first if it is still soft, the egg will set to a large lump when adding to the cooked tomatoes.

Method 2: Some prefer to cook the tomatoes then stir in the beaten egg at the last minute just to set it. I find this method can be a hit and miss sometime the egg can become too soft like a thick sauce than separated pieces of scrambled egg. Also with this method the egg is likely to stick to the pan/wok if it is not super non stick, and scraping it off will end up with tiny bits of overcooked egg. .

This is the way how I cook this dish.

Is there a technique with the tomatoes? Yes. The cooked tomatoes must be rather soft and juicy. First to think about is selecting the right tomatoes. Best use bright red, ripe and juicy tomatoes anemic looking ones make this dish unappealing.  Some people prefer to skin the tomatoes but I never bothered. To skin the tomatoes just blanch in boiling water till the skin is peelable. Next is the cooking time, the tomatoes must be cooked long enough to soften and juice running out. I like a lot sauce with this dish so I normally add some water. If the tomatoes are still quite raw and hard this will take much longer too cook or there won't be enough sauce for the egg to absorb. To balance the sharpness of tomatoes do not be afraid to add sugar, amount to your taste or sweetness of the tomatoes.

Tips:

If the tomatoes are quite anemic and tasteless, the trick is to add some tomato paste not too much just enough to colour and beefing up the tomato flavour.
If the tomatoes are still quite firm when you bought them, leave them out at room temperature to ripen. Room temperature tomatoes taste better than cold.

How to scramble the egg there is a technique too. Some people prefer to stir fry or scramble the egg till the egg surface has turned brown this gives a nuttier flavour but the egg will be tougher.  For me I like the egg soft and fluffy but still in chunks. To do this first is to beat the egg till lightly frothy just before cooking. I normally like to add some slacken cornflour to make the egg nice and soft, also a touch of cooking wine and salt to flavour the egg. The secret to fluffy egg is super hot wok and quite a bit of oil so when the beaten egg hits smoking hot oil it will fluff up right away and set really quickly without making it tough. If using too little oil or medium hot oil the egg will cook but will not be fluffy. Fluffy egg will absorb the tomato juice better.

Flavouring for this dish is really simple, just some chopped garlic, spring onion and a little cooking wine. The only seasoning is just salt and some sugar to balance the tomato. If you find just salt is lacking flavour you can add a touch of light soy or fish sauce. I like mine simple.

Tomatoes and eggs ratio is also important. To much tomato may turn this dish really sharp and lacking the eggy flavour or too much egg will lack the right balance too. I normally use 1 egg :to about 125g tomato.

This is the best simple home cooking when tomatoes are much nicer and tastier in the summer when they in abundance and much cheaper. If you like the sound of this dish. Give it a try. Simple and tasty with rice or nice with noodles too.

Ingredients needed : tomatoes, eggs, chopped garlic, chopped spring onion, cooking oil, some Chinese cooking wine, cornflour (cornstarch), salt and water. Tomato paste is optional if tomatoes are not too flavourful or red.


This is the quality of ingredients I am using.
Method:
Cut tomatoes into wedges no thicker 2.5cm.
Mix a dash of cooking wine with some cornflour or cornstarch (about 1 tbsp wine and 1 tsp cornflour to 2 eggs) and pinch of salt. Add egg and beat till frothy with pair of chopsticks or fork.
Chop some garlic and few stalks of spring onion.
Add some oil fry the garlic and some of the chopped spring onion till fragrant. Add in tomato pieces, stir fry for a minute or two till tomato pieces are heated through and beginning to soften. Then add in a splash of water. Cook tomato till soften and juice is running out. Have a taste if too sharp add some sugar. If tomato is quite tasteless add a small dollop of tomato paste. Keep the sauce runny, if not enough add a little more water. Season with enough salt (and/or soy or fish sauce) to taste. Remove and clean the pan or wok.
Heat the wok till very hot, add in about 5 - 6 tbsp of cooking oil and swirl the oil around the wok/pan and heat till smoking hot. Pour in the egg you will notice the egg fluff up very quickly. Stir with a pair of chopsticks till egg has scrambled into pieces and soft set. If you like a nuttier flavour do not touch the set egg for few seconds and let some pieces browned on the bottom. The amount of oil can be quite a lot but this makes a difference to the texture of the egg.
Stir in the cooked tomato and rest of the chopped spring onion. If you find the sauce too runny for you liking you may thicken it with a little slackened cornflour. If sauce it too dry add a touch more water.

Cocktail buns


Cocktail buns (雞尾包 gai mei bao) were originated from Hong Kong, now available in nearly all oriental bakeries in the world. These are soft buns filled with a buttery coconut filling. I love them since I was a kid. Not very slimming but utterly delicious especially when they are still warm.

Most bakeries use dough improver to make the buns very soft. I love the softness of the bun texture but reluctant to use any additives or chemicals. I have read about adding cooked flour paste can make the bun (bread) really soft, so am going to try for this recipe.

The result was a success. The buns were tasty and soft. I will from now use this method for soft buns.

I just had a few of these buns while typing this post. Very full but feeling really satisfied!! May need some indigestion tablets ;)..


This recipe makes 12 buns

Ingredients:

A. bread dough:

cooked flour paste:
150ml water
25g of plain flour


50g sugar
2 eggs
30g butter
200g white strong (bread) flour
175g plain flour
1 tsp quick acting (instant) yeast

more flour for dusting (strong or plain)


B. Butter coconut filling

75g plain flour
25g custard powder
150g butter (straight from the fridge)
80g sugar
50g dessicated coconut
60g full cream milk powder
1 tbsp of water

C. topping
20g butter
20g plain flour
2 tsp of beaten egg
1/2 tsp sugar

1 tbsp beaten egg for glazing

1 tbsp raw sesame seeds

sugar syrup: 1 tbsp sugar + 1.5 tbsp water


Method:


Mix water and flour for the flour paste till no lumps, then cook with gentle heat till the mixture thicken.
Leave to cool slightly, add butter and sugar stir till melted. The stir in beaten eggs. Dip your finger into the mixture, test if it is just luke warm if not leave it cool further. Mix both plain flour, bread flour and yeast together then mix in the liquid mixture. Then knead the dough for few minutes till smooth. Add more flour for dusting if the dough is wet.
Cover and leave the dough to rise to double in size.
While the dough is rising, make the filling. First using a small sauce pan heat the plain flour and custard powder for 2 - 3 minutes till hot. Leave flour to cool in the pan for about 1 minute. Add in the butter and sugar, stir till butter melted. Then add in remaining ingredients till all combined. If the mixture looks oily leave to cool in the fridge for about 15 - 20 minutes.
When the dough has risen, knock it down, roll into a log shape and cut into 12 equal parts.
Take each piece of dough roll into a ball then flatten it into an oval shape about 10 x 6 cm and put on about 2 tbsp filling. Seal the edge. If the dough won't seal properly dampen with a touch of water along the edge. shape into an olive shape. Use flour for dusting if necessary.
Put the buns onto a greased baking tray (Swiss roll tin), sealed side facing down if not the bun can split open easily.
When all the buns are made, leave the buns to rise for about 15 minutes.
Make the topping mix, mix all the ingredients together till a soft paste is formed. Spoon this into a small plastic bag, cut the tip end for piping.
Brush the buns with beaten egg then pipe on the topping mix and sprinkle the top with sesame seeds.
Bake in a preheated 180 deg C oven for 15 minutes.
While the buns are baking make the syrup by heating sugar and water together till sugar dissolves. I do this by putting both in a small bowl and ping in the microwave for about 30 seconds.
When the buns are done, take them out and brush with sugar syrup. Sugar syrup makes the buns really shiny.
Leave to cool and enjoy with a nice cup of tea.

Hong Kong Cafe style breakfast


Hong Kong is a food paradise. When I was working there few years ago, I hardly ever cook. Dim sum with friends was the routine every Sunday. During the working week Cafe restaurants were probably where I went for breakfast, lunch and sometime dinner most of the time. I love HK cafe restaurants or 'cha chaan tian' 茶餐廳, they serve food and drinks all day long from egg and bacon sandwich, french toast, Portugese egg tart to stir fried noodles/rice etc....

One of my favourite cafe breakfast is 'chaan dan tung' 餐蛋通 to wash down with 'yin yan lai cha' 鴛鴦奶茶. Chaan dan tung is macaroni soup with fried spam and fried egg, while yin yan lai cha is a milky tea with coffee. Both sound very strange but really quite tasty and reasonably cheap.

Here is what I do to recreate this at home occasionally for weekend late breakfast.

For the chaan dan tung 餐蛋通, all you need are these ingredients then assemble together

some tasty chicken or pork stock
cooked macaroni
one fried egg per person
2 slices of fried spam or Chinese luncheon meat per person
some blanched Chinese green (like choi sum) or iceburg lettuce
light soy and ground pepper to taste

Heat the stock add cooked macaroni and seasoned to taste then top with fried spam, fried egg and some veg.


For the yin yan milky tea coffee 鴛鴦奶茶

Blew some tea, preferably Lipton, Ceylon red tea or any far east brand English tea. If not use normal Tetley or other English tea.
Blew some light fragrant coffee like Arabica or Columbian, freshly ground is better but can also use instant if you like
Some hot milk or evaporated milk
some sugar (optional)

Mix 50:50 brewed hot tea with coffee add plenty of hot milk or some evaporated milk. Evaporated milk gives a distinctive S E Asian tea/coffee taste. I don't normally add sugar to tea or coffee but yin yan tea coffee is nice with some sugar.

Yin Yang tea coffee is nice too cold with plenty of ice. If you fancy you can add crushed iced, black pearls to make bubble tea 珍珠鴛鴦奶茶, serve in a tall glass with extra wide straws.

Thursday, 5 March 2015

Corn Dogs Recipe


Corn Dogs

Ingredients
1 cup Cornmeal
1 cup Flour
1/2 tsp. Salt
1/4 cup Sugar (use 1/2 cup for sweeter breading)
4 tsp. Baking Powder
1 Egg
1 cup Milk
12 Polish Hot Dogs cut in half or 16 all beef hotdogs
Wooden Skewers

Procedure
1. Boil Hot Dogs or Polish Dogs (don't over cook, about 4-5 minutes), while dogs are boiling, heat your deep fryer to 350 or use a large pot with enough oil to cover corn dog completely.
2. In a large bowl, combine dry ingredients together, cornmeal, flour, salt, sugar and baking powder.
3. In a separate bowl, beat egg with milk. Slowly add dry ingredients to wet while mixing. Your product should look thick, almost like grits.
4. Stick dogs with skewer (if using polish dogs you can cut them in half, in this picture we used Polish Dogs).
5. Dip dogs into batter to coat. Don't worry about coating your dog too thick, the batter will puff up, just make sure your dog is completely coated.
6. Fry only 3 dogs at a time so your batter won't burn, keep an eye on them, they cook very quickly.
7. Remove from oil and place in pasta strainer while you are making the rest of the dogs.
8. Serve with Mustard and Ketchup!

Note*** While you are waiting your batter might get thick, use a spoon to mix your batter between each dipping.

Kid Approved Onion Rings


The hardest thing in the world is to make a child eat their vegetables. The second hardest is getting them to eat homemade onion rings! If your supermarket is anything like mine, get ready to pay over $7 for a bag of onion rings. I've made onion rings so many times that I've honestly have lost count. Last month I wanted to make onion rings, again! Once got my oil hot, and my onions sliced, I noticed I didn't have flour! I looked around my whole kitchen and YUP, I was all out, it was too late to go to the supermarket and I wasn't in the mood to make anything else. Just when I was about to turn off the stove, I saw a bag of Hungry Jack's Butter Milk Pancake Mix, so I decided, "Oh what the hell", long story short, they are the BEST homemade onion rings you will ever make!!! You don't even need to season these rings. My little cousins loves them, and I hope you and your children will love them too! Who wouldn't like fried pancakes!

Homemade Kid Approved Onion Rings
Ingredients
2 medium white onions
2 packages of Hungry Jack Buttermilk Pancake mix (7oz each)
1 cup of water
1 small brown paper bag
Oil for deep frying

Procedure

Slice onions from 1/2 to 1 inch thick.
Using a medium size sauce pan add 3 inches of oil, heat over medium heat
In a small bowl, empty one package of pancake mix and mix with water. (Batter)
In the small paper bag, empty the contents of the other pancake mix.
Dip onion rings in batter, than transfer to paper bag, shake bag so that the rings are covered with the dry mix (have the kids do this fun part), remove rings and place on a plate and let dry for approx 5 minutes.
After 5 minutes, deep fry onion rings until golden brown.
Serve with ketchup, hotdogs, hamburgers or a patty melt!
Related Posts Plugin for WordPress, Blogger...