Showing posts with label Chicken. Show all posts

Tuesday, 31 March 2015

Crazy Good Indian Butter Chicken


I'm not kidding, this dish is amazing. For years I have wanted to duplicate Indian Masala dishes found at my favorite Indian restaurant, The Bombay House, in Utah. My girls and I ADORE masala. Nothing made at home ever came close, I never found good recipes in books or online.

Sigh...

I get stubborn about these things sometimes... I again did my research, and still did not find what I was looking for. BUT, I decided to start with a basic Indian gravy and work from there. I knew I wanted a creamy, buttery tomato base. I did not want to taste an over abundance of cumin, which most home made recipes have. I also did not want the sauce to be acidic tasting from the tomato, again, most home made sauces are too sour. I wanted a harmonious marriage of exotic Indian spices, peeking their way through, delighting the taste buds. The sauces I love also have a subtle sweetness to them too and I wanted to duplicate that.

I cooked and tasted carefully, adding more spices and "stuff" until the sauce "officially arrived".

The sauce turned out so rich and flavorful. The chicken was so moist and tender, with a touch of tang that perfectly complimented the decadent sauce. Served over basmati rice, and garnished with cilantro, it was perfect. We enjoyed it more than the version served at most Indian restaurants. I usually have to have tamarind chutney on the side to fully enjoy this dish, but this has such a nice flavor that I didn't need it at all. We fell into a blissful Indian food coma after this incredible meal. We were SO happy, just sayin'.

This is a sauce you can add any meat to, not just the marinated chicken recipe below. You can make it vegetarian, by adding Paneer (an Indian cheese). Oh, how I love paneer... I tried making it once - epic fail. I'll figure that one out too some time.

This makes enough sauce to serve about 8 people, or 2 meals of 4. I like to make the sauce ahead of time and store it in the fridge until needed. Restaurants also make their sauces in advance, in big batches, to save time. They will then customize it to order for their patrons. Marinating your meat ahead of time makes for quick meals come dinner time.

This recipe is surprisingly easy to prepare.  How great is that?

Serve with basmati rice for authenticity and true deliciousness. I like to garnish with fresh chopped cilantro too.

Garlic Naan is a natural to serve with Indian food, My recipe is not gluten-free (yet), so I will not share it with you here.

Here is my original prized recipe, I now present it to you...


Marinated Chicken:

3 to 4 fresh or thawed skinless chicken breasts, cut into chunks
1 T. fresh lemon juice
1/2 T. mashed garlic
1/2 T. grated fresh ginger
1 T. plain yogurt (Greek yogurt works too)
1 t. garahm masala powder (recipe on this blog)
1/2 t. tumeric powder
1/2 t. chili powder
1 t. BioSalt (recipe on this blog)


Method:

Mix the marinade with the chicken in a heavy duty Ziplock bag. Coat the chicken evenly.

Let marinate in your refrigerator for at least 4 hours, overnight is even better (you may store in your refrigerator up to 3 days this way).


Makhani Masala Sauce (a thick buttery tomato based sauce):

2 T. virgin coconut oil
1/2 c. pureed onion
1 T. fresh grated ginger (paste)
1 T. smashed garlic (paste)
1/2 to 1 T. kasuri methi (dry fenugreek leaves), optional to taste (Indian food stores)
1 1/2 t. Graham masala powder
1 t. Ancho red chili powder
1/2 t. plus 1/8 t. Saigon cinnamon
1/2 t. cardamom powder
1/2 t. tumeric powder, optional (I left it out this time)
1 pinch red hot pepper flakes
1 green chili, minced, optional (I left it out this time)
3 8-ounce cans tomato sauce
1 c. hot water
1 c. heavy cream (Dairy-Free Version: omit cream and water, add 2 cans full-fat coconut milk)
2 t. xylitol
1 1/2 t. BioSalt, to taste (recipe on this blog)
1 T. butter (omit if dairy-free version is desired)


Method:

Heat 2 T. coconut oil in a large sauce pan over medium-high heat..

Add ground onion  and saute until it starts looking translucent.

Add the ginger paste, garlic paste and kasuri methi, if using (I did not have any).

Saute until the mixture until it starts to sizzle and let it sizzle a few minutes. Don't let it burn.

Add a touch of water if you feel the onion is sticking to the bottom of the pan.

Add the graham masala, chili powder, cinnamon, cardamom, hot pepper flakes, and green chili.

Mix well in the pan. Add the tomato sauce and 1 c. hot water.

Turn the heat down to medium, cover and let cook for about 15 minutes, stirring occasionally.

Add 1 c. heavy cream and 2 t. xylitol, stir and then bring up to a boil again, uncovered.

Add 1 1/2 t. BioSalt and 1 T. butter, stir in and remove from heat.

Taste for seasoning. It should have a subtle sweetness from the xylitol and sweet spices.

Use the sauce immediately or pour into a quart jar and store in your refrigerated until needed.

There is enough sauce to prepare 2 batches of the marinated chicken above.


To Prepare The Meal:

Prepare the basmati rice according to the directions for your rice cooker, using 3 cups rice, the amount of water called for, 1 T. butter and a heaping t. BioSalt.

In a large frying pan, heat the 2 T. coconut oil and fry the chicken pieces for about 3 minutes on each side, until starting to brown. don't over crowd the chicken in the pan.

Once the chicken is done, Add the prepared sauce, about 2 cups worth.

Stir together and gently heat through. Thin with a little water as needed.

Top with fresh chopped cilantro.

Serve over hot cooked basmati rice.


Notes: 

In the future I may puree the sauce to make it even more velvety.

I used our home made Garam Masala spice blend recipe found on this blog.


See pictures of the cooking process:

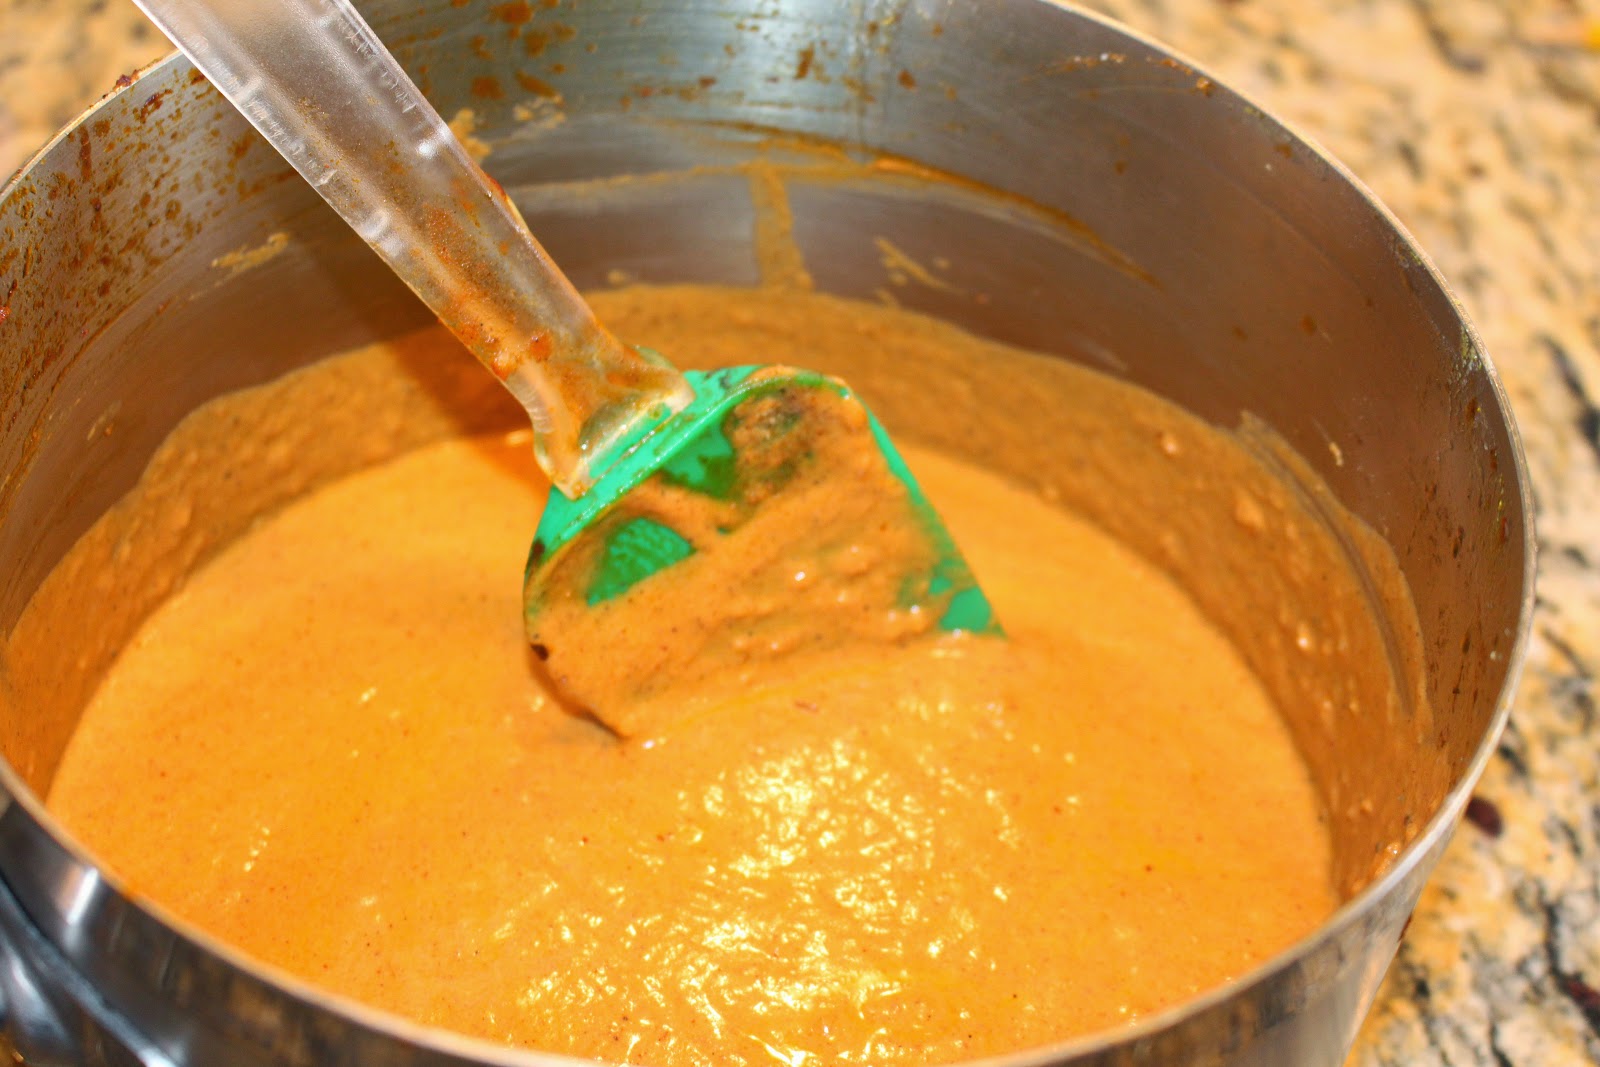
The sauce is the boss!


Sauce ready to put into the fridge.


The chicken is marinating...


Virgin coconut oil is perfect for this dish.


Coconut oil is melted in the pan and marinated chicken is placed inside...


Saute chicken until golden and flip over to brown the other side.


Pour in about half a jars worth of  prepared sauce.


Add a bit of water when the sauce gets too thick.


The finished chicken and sauce.


Monday, 30 March 2015

Fajitas

Oh Yeah. I ate 2 of these babies for dinner!

These have been made in my home for many years, and we never tire of them. They are easy to make and very flavorful. The fresh lemon juice in the marinade is perfect. I have even let the chicken marinate in the refrigerator for 3 days before making. I did not do that on purpose, life just got busy. I imagine you could marinate the meat and freeze in serving-size packets for make ahead meals.

You can use any type of tortilla you want to. For this particular dinner we tried a new organic whole wheat flour tortilla. They are thinner than most tortillas, which I like. See the review for these tortillas at the end of this post.

For a gluten-free meal, make this a chicken fajita salad or use gluten-free tortillas (usually yucky though, I'm afraid). If you ever find a delicious GF tortilla, let me know.

Use vegan sour cream and cheese, if you are into that.

Of course you can vary your toppings too. Your favorite bottled salsa will do when tomatoes are not in season.


My Favorite Fajitas Recipe:

1 1/2 pounds skinless, boneless chicken breasts or beef

Marinade:

1 to 2 cloves garlic, smashed well
1 1/2 t.gluten-free seasoned salt (recipe on our blog)
1 1/2 t. ground cumin
1/2 t. gluten-free chili powder
1/2 t. crushed red pepper flakes
2 T. rice bran oil or light olive oil
2 T. fresh squeezed lemon juice

Fajita:

3 to 4 T. deodorized coconut oil
1 c. sliced onion
1 c. red bell pepper
1 c. yellow bell pepper
8 flour tortillas, of choice, warmed
2 avocados, sliced or mashed with onion salt, garlic powder, and lemon juice
1/2 c. chopped scallions
sour cream of choice (Reduced Fat Sour Cream Blend - recipe on this blog)
shredded cheese of choice
fresh salsa
fresh cilantro, minced


Method:

Cut the meat into thin strips (you may partially freeze for easier cutting).
Marinate the sliced meat in the combined marinade for 2 hours (even up to 3 days in fridge is o.k.)
Quickly saute the vegetables in coconut oil until lightly browned (sear them over med-high heat).
Remove vegetables from pan.
Saute the meat in coconut oil about 4 minutes.
Toss the meat with the vegetables and serve.
Spoon meat & veggie mixture into flour tortillas.
Garnish with avocado, sour sream, scallions, cheese, salsa, and cilantro as desired.


Tip:

I like the way restaurants serve fajitas seared and sizzling. Without having to grill the meat on an outdoor grill, this is what I do in my home kitchen:

I will often cook the meat in a large non-stick skillet while I am searing the vegetables in a well-oiled cast iron pan. I remove the vegetables and set aside. I drain the barely cooked meat, reserving the juices. I add the barely cooked meat to the well-oiled cast iron skillet and toss, to quickly sear it a minute or so. I then add the vegetables back to the skillet with the meat and toss to warm through. To finish the fajitas off, I pour the reserved juices over top. toss and serve.

Saturday, 28 March 2015

Ropa Vieja

Ropa Vieja stuffed buritto topped with Tomatillo Ranch Dressing

This dish has excellent flavor and is great used so many ways. We love it in tacos, burritos, wraps, tostadas, and on top of salads.

Left over roast turkey is terrific prepared this way, especially the dark meat. This Thanksgiving, My husband and I brined and roasted 2 Thanksgiving turkeys for our family gathering. What were we thinking?! We heard that roasting 2 smaller turkeys was the way to go. well I don't think our 2 turkeys were that small. We had over a turkey left over. We put most of the turkey in the freezer. Later, I shredded the turkey and made this Ropa Vieja. My family loves it. I packaged it into about 6 quart-sized zip-lock bags and put them in the freezer. 1 bag is more than enough for a family meal.

I love that I can prepare a large batch and then have quick, delicious meals for later.


ROPA VIEJA Recipe:

2 large onions, cut into thin rings, then halved
3 pounds shredded turkey meat (all dark or dark with some light meat)
9 cloves garlic, mashed with 2 t. BioSalt (recipe on this blog), or sea salt
1/2 cup, or more coconut oil (deodorized 76-degree)
1/2 t. garlic powder
1 T. onion powder
1 t. Mexican oregano, crushed between palms
1 T. sweet paprika
1 T. ground cumin
1 T. Ancho Chile pepper powder
50 grinds of freshy ground black pepper
1 t. annatto powder, optional
1/4 c. or more Red Palm oil


Method:

Saute sliced onions in 2 T. of the coconut oil until brown and getting crispy.
Lightly dredge the shredded turkey meat in about 1/4 to 1/3 cup gluten-free flour (recipe on blog).
Place the dredged turkey into the pan with the browning onions.
Add the rest of the coconut oil into the pan.
Toss and cook the meat over medium-heat and start browning the meat.
Add the seasonings and toss to coat the meat evenly.
Keep browning, turning occasionally.
Add the Red Palm oil when the meat is almost done browning. mix in well.
The meat should be moist, nicely colored, and fragrant.
Check the seasonings and adjust to taste.
Remove from heat and serve.
Freeze the leftovers in meal-sized portions.


Enjoy,

Thursday, 26 March 2015

Chicken Alfredo Casserole


This recipe is similar to another one I have for Chicken Alfredo Bake but I love the addition of tomatoes and grilled onions in this one. I saw this posted on my cousin Lisa's blog and it hit the spot for dinner the other night. It was pretty easy to whip up last minute too. I used my recipe for Guiltless Alfredo for the sauce and then leftover sauteed chicken from dinner the other night. This casserole calls for fettucine - which I used and it was great - but most pastas would probably work just as well.

Chicken Alfredo Casserole

16 oz. fettuccine noodles
16 oz. alfredo sauce - or guiltless alfredo recipe (see link above)
6-8 chicken tenderloins - or about 1-2 breasts
1/2 cup cubed ham - I used regular thin slice deli ham.
2 roma tomatoes
1/2 an onion
1/4 cup butter - I used about 1-2 Tbsp.
salt and pepper to taste

Preheat oven to 350 degrees. Cook fettuccine noodles as directed, drain, and pour into 9x13 Pyrex dish. Stir butter into noodles until completely melted and mixed in. Fry chicken tenderloins and slice into strips. Place chicken and cubed ham on top of noodles. Pour alfredo sauce over everything evenly, but do not mix in. Cut tomatoes into circles, and place on top of casserole. Add salt and pepper. Cut onion into rings, and fry. Place fried onions on top of casserole. Bake for 30 minutes, or until heated through.

Tater Tot Casserole


Ingredients:
2 lbs of ground beef
seasonings as desired (ie. salt, pepper, garlic powder)
onions ( I used dry onion flakes)
2 cans of cream of chicken or mushroom soup (or cream of celery if desired)
1 pkg frozen tater tots
Shredded cheese (optional)

Directions:
Brown hamburger in skillet, add onions to soften.  Add seasoning and soups, heat through.  Add mixture to 9 X 13 pan.  Bake at 350 degrees for 20 minutes.  Add frozen tater tots to cover mixture and sprinkle with cheese on top.  Bake another 20 minutes or until tater tots are cooked through. 
It's yummy with ketchup!  

Wednesday, 25 March 2015

Basil Chicken in Coconut Curry Sauce


This really hit the spot with me tonight.  I don't cook with curry very often but after making this dish, I may have to change that.  All four of the adults who consumed this tonight had seconds.  Always a good sign.

Basil Chicken in Coconut Curry Sauce

2-3 boneless, skinless chicken breast halves
2 teaspoons curry powder
1 teaspoon salt
½ teaspoon pepper
¼ teaspoon chili powder
1 medium red onion, chopped
5 cloves garlic, minced
2 jalapeno peppers, seeded and finely chopped (By seeding the jalapeno you lose most of the heat but retain great flavor.)
1 Tablespoon olive oil
1 14-ounce can coconut milk
1 Tablespoon cornstarch
1 Tablespoon dried basil
1 teaspoon grated fresh ginger

3 cups hot cooked rice

Cut chicken into 1-inch pieces. Place in medium bowl. Stir together curry, 1/2 teaspoon salt, pepper and chili powder. Sprinkle over chicken, tossing to coat evenly. Cover and chill for 1 to 2 hours.

In a large nonstick frying pan, stir onion, basil, garlic and peppers in hot oil over medium-high heat for 3-4 minutes, until onion is translucent. Add chicken and remaining 1/2 teaspoon salt and cook for 5-6 minutes until no longer pink.

Combine coconut milk and cornstarch and whisk well to combine. Carefully add to skillet, whisking vigorously. Cook and stir until slightly thickened and bubbly. Stir in ginger. Cook and stir for another minute. Serve over hot rice.

Grilled Lime Coconut Chicken with Coconut Rice


I've been wanting to try this recipe for some time and finally got around to it this past weekend.  The chicken turned out super moist and flavorful and it pairs so nicely with the coconut rice.  I only have brown rice on hand these days but it was worth Ben's late night trip to the store for Jasmine rice to make this.  This recipe was one of the most popular recipes onMel's food blog during 2013.

Grilled Lime Coconut Chicken with Coconut Rice 

Chicken Marinade/Sauce: 
  • 3 tablespoons oil
  • Zest and juice of 1 lime
  • 1 teaspoon ground cumin
  • 1 1/2 teaspoons ground coriander
  • 2 tablespoons low-sodium soy sauce
  • 1 1/2 teaspoons salt
  • 2 tablespoons sugar
  • 2 teaspoons curry powder
  • 1/2 cup canned coconut milk, light or regular
  • pinch cayenne pepper
  • 2 pounds boneless, skinless chicken breasts (see note above)
  • 1/4 cup chopped fresh cilantro
  • Fresh limes, cut into wedges
Coconut Rice:
  • 1 cup jasmine rice
  • 1 cup canned coconut milk, light or regular
  • 1 cup water
  • 1/2 teaspoon salt

  1. In a large liquid measuring cup or medium bowl, whisk together the oil, lime zest, lime juice, cumin, coriander, soy sauce, salt, sugar, curry powder, coconut milk, and cayenne pepper. Place the chicken in a large ziploc bag and pour the marinade over the chicken. Seal the bag and refrigerate for at least 2 hours and up to 8 hours.  (I actually marinaded over night and it was delicious.)
  2. For the coconut rice, bring the rice, coconut milk, water and salt to a simmer in a medium saucepan. Cover, reduce the heat to low and simmer for 15-16 minutes until the liquid is mostly evaporated. remove from the heat and let stand for 10 minutes before fluffing with a fork and serving.
  3. Preheat a charcoal or gas grill (see note above if not grilling) to medium-high heat. Grill the chicken for 6-7 minutes per side (actual time will depend on the thickness of the chicken). While the chicken is cooking, pour the marinade into a small or medium saucepan. Bring the mixture to a rolling boil and boil for 10 minutes, stirring occasionally.  
  4. Place the grilled chicken on a serving platter or plate. Drizzle with sauce (reserve the remaining sauce to serve separately) and sprinkle fresh cilantro over the top. Serve with lime wedges and additional sauce. 
**Since my husband said it was too cold to grill and my broiler pan wasn't large enough for all the chicken, I cooked the chicken with the sauce in my electric skillet.  It worked great.

Creamy Green Chile Chicken Enchiladas


These would have looked so much prettier had I remembered to sprinkle the fresh chopped cilantro on top!  Oh well, they were still very tasty and I will definitely be making them again...a great option when you crave a white sauce enchilada.

Filling:
3 cups cooked, chopped chicken
2 (4 oz.) cans of green chiles, lightly drained
1 package (8 oz.) cream cheese, cubed
1 can white or black beans, rinsed and drained

Sauce:
2 tablespoons butter
1/2 cup chopped onion (about 1/2 medium onion)
2 tablespoons flour
1/3 cup chicken broth
¼ cup milk
¼ teaspoon salt
¼ teaspoon pepper
1 can (7 ounce) green chile enchilada sauce
½ cup sour cream

8 ounces (about 2 cups) Monterey jack cheese, shredded
8 medium (soft taco size) flour tortillas
Handful of chopped fresh cilantro

Preheat oven to 375 degrees.

In a medium bowl, combine the softened cream cheese and green chiles. Mix well. Add the chicken and black beans. Mix to combine. Set aside.

In a large nonstick skillet, melt the butter over medium heat. Add the onion and cook, stirring occasionally, until the onion softens and starts to turn translucent, about 3-4 minutes. Sprinkle the flour over the onions and stir well. Cook for 1 minute, stirring. Slowly whisk in the chicken broth and milk. As you whisk and the mixture cooks, the flour will get less lumpy around the onions and the mixture will become smooth. Cook over medium heat until the mixture is bubbling and has thickened, about 4-5 minutes. Remove the skillet from the heat and stir in the enchilada sauce and sour cream.

Lightly grease a 9X13-inch baking dish. Spread about 1/4 cup of the sauce on the bottom of the dish. Fill each tortilla with about ½ cup of the chicken/cream cheese filling. Top with a small handful of shredded cheese, a couple tablespoonfuls for each enchilada. Save at least 1/2 cup cheese for the top of the enchiladas. Roll the tortillas up and place seam side down in the prepared baking dish. Continue filling enchiladas until the dish is full.

Pour the white sauce over the top of the enchiladas. Top with remaining cheese. Bake for 20-30 minutes until the enchiladas are bubbling, hot and lightly browned. Sprinkle fresh cilantro over the top and serve.
Related Posts Plugin for WordPress, Blogger...